Use Swift in a Kotlin/Multiplatform library
- Kotlin
- Multiplatform
- Deep dive
- 10 min.
As you probably know, Kotlin/Multiplatform allows you to share everything that is specific to your app and provides value from your business perspective. Once written, you only have to deploy it to your native apps!
However: nothing is that simple. You’ll always need core platform features to handle tasks for you that are needed by your business but not integral to it. Things like data persistence, HTTP requests, date and time manipulation, etc. Some of these can be solved with existing libraries, and sometimes the library that does exactly what you need just does not exist.
Apple is heavily invested in Swift, its in-house programming language, and has now decided to expose all of iOS’s newer APIs in Swift only. This may be a problem as Kotlin/Native can run C and Objective-C code, but cannot run Swift code directly.
All is not lost, however, as Swift can interop pretty well with Objective-C, so we can use Objective-C as a bridge between Swift and Kotlin.
Since Swift’s ABI has been stable since 2019, I find it unfortunate that JetBrains has not invested in making it possible to run Swift code from Kotlin. That said, given how complex that would be, I understand the choice to put the effort into needs that are less niche.
An example of iOS API that is only exposed in Swift is the CryptoKit API that was introduced as part of iOS 13. Let’s say we want to use the ChaCha20-Poly1305 algorithm it provides.
For reference, ChaCha20-Poly1305, affectionately known as ChaChaPoly, is an Authenticated Encryption that, as its name suggests, allows you to encrypt and authenticate a secret message. It is widely used in modern protocols as it is highly optimizable on standard X86 and ARM processors.
The example used in this article (ChaCha20-Poly1305) comes from a real need of one of my clients, who had to access this encryption primitive from their business code. This article exists because letting Kotlin code call Swift code means solving a genuine puzzle, where the documentation for each piece is either missing or very sparse: the Objective-C bridge, the bridging header, the static export of the library, importing the library through Kotlin cinterop, and manipulating native memory in Kotlin/Native.
Admittedly, for an application, it is possible (and, let’s be pragmatic, even desirable) to use the dependency injection pattern so that the application can access code written in Swift. That approach is not possible for a library, which is why the puzzle is necessary in that case.
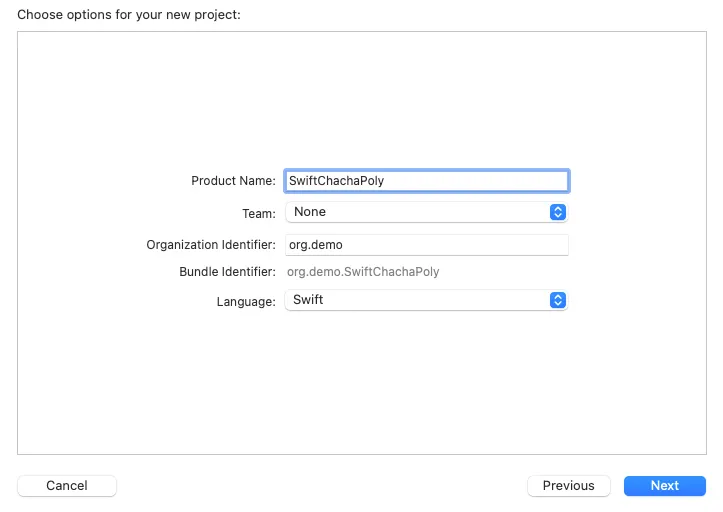
First, we need to create an Xcode project that will provide an Objective-C bridge to the Swift API we want to consume. For that we’ll create a Swift static library.
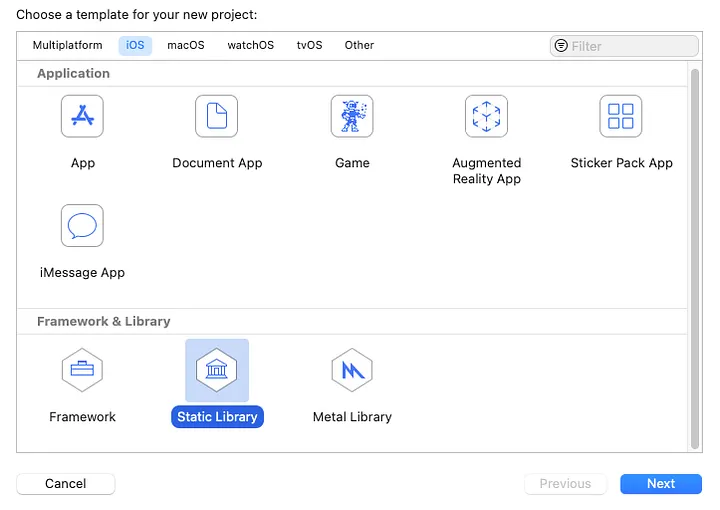
As CryptoKit is only available in Swift, we need to create a Swift static library, and write our own API as a facade over it.
We need to provide a way for our API to return either a data result or an error. The Swift Result type is not available in Objective-C because it cannot handle Swift generics. Let’s write our own.
@objc public class DataResult: NSObject {

  @objc public private(set) var success: Data?
  @objc public private(set) var failure: Error?

  private init(_ success: Data?, _ failure: Error?) {
    super.init()
    self.success = success
    self.failure = failure
  }

  public convenience init(success: Data) {
    self.init(success, nil)
  }

  public convenience init(failure: Error) {
    self.init(nil, failure)
  }

  public convenience init(_ block: () throws -> Data) {
    do {
      let data = try block()
      self.init(success: data)
    } catch {
      self.init(failure: error)
    }
  }
}
Xcode will automatically generate an Objective-C interoperability layer. For that, two conditions must be met:
• A Swift class exposed to Objective-C must extend NSObject
• All symbols exposed to Objective-C, whether classes, methods or properties, must be public and annotated with @objc.
As you can see in this code, we have only annotated the DataResult class and its two properties. The constructors are not annotated as a DataResult will only be constructed in Swift.
We can now write our interop layer:
@objc public class SwiftChachaPoly : NSObject {

  @objc public class func encrypt(key: Data, nonce: Data, aad: Data?, plaintext: Data) -> DataResult {
    DataResult {
      let symKey = SymmetricKey(data: key)
      let chaNonce: ChaChaPoly.Nonce = try ChaChaPoly.Nonce(data: nonce)
      let sealedBox: ChaChaPoly.SealedBox
      if let aad = aad {
        sealedBox = try ChaChaPoly.seal(plaintext, using: symKey, nonce: chaNonce, authenticating: aad)
      } else {
        sealedBox = try ChaChaPoly.seal(plaintext, using: symKey, nonce: chaNonce)
      }
      return sealedBox.ciphertext + sealedBox.tag
    }
  }

  @objc public class func decrypt(key: Data, nonce: Data, authenticatedData: Data, ciphertextAndTag: Data) -> DataResult {
    DataResult {
      let tagIndex = ciphertextAndTag.endIndex - 16
      let ciphertext = ciphertextAndTag[ciphertextAndTag.startIndex ..< tagIndex]
      let tag = ciphertextAndTag[tagIndex ..< ciphertextAndTag.endIndex]
      let symKey = SymmetricKey(data: key)
      let chaNonce: ChaChaPoly.Nonce = try ChaChaPoly.Nonce(data: nonce)
      let sealedBox: ChaChaPoly.SealedBox = try ChaChaPoly.SealedBox(nonce: chaNonce, ciphertext :ciphertext, tag: tag)
      return try ChaChaPoly.open(sealedBox, using: symKey, authenticating: authenticatedData)
    }
  }
}
Just like DataResult, the SwiftChachaPoly class follows the same Objective-C interop conventions. Its functions take Data parameters which are automatically translated to NSData in Objective-C, and return our very own DataResult.
Internally, these functions use CryptoKit and its ChaChaPoly class and subclasses. These types are purposefully not exposed to Objective-C. Only a simple interface that’s easily translatable is exposed.
There’s one last thing we need to configure in Xcode: the automatically generated Swift interop Objective-C header.
First we need to create an empty bridging header file, and configure it in the static library configuration. Even though it is empty, this header informs Xcode that it needs to run the Objective-C interop generation.
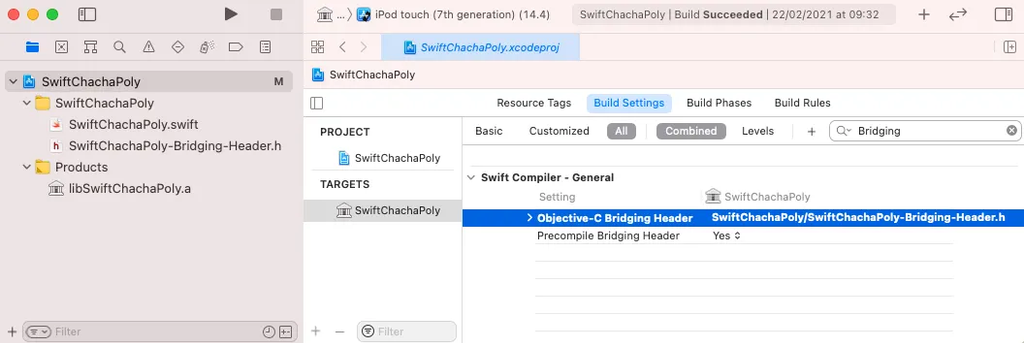
We also need to export the generated interop header with the compiled static library. This is done with a Run Script build phase.
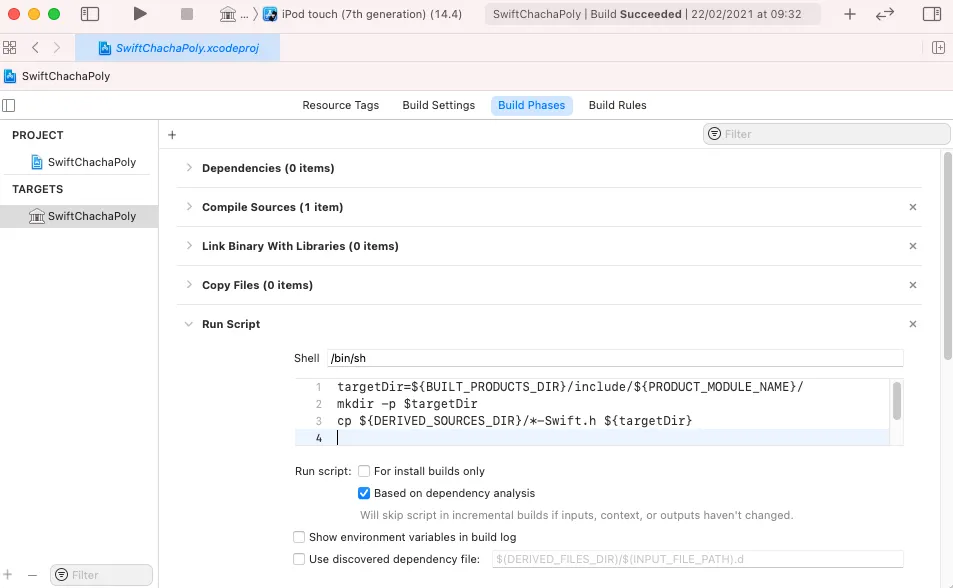
Now, once the library is compiled, it generates an Objective-C header that exposes our very own ChachaPoly API.
Back to our Kotlin/Multiplatform library project.
To use the static library we just created in our Kotlin/Native code, we need to ask Kotlin/Native to generate its own interoperability layer for the Objective-C API defined in the header.
For this, we need to add an interop phase to our build. Interop phases are configured using a definition and a Gradle configuration.
If we want to add a “SwiftChachaPoly” interop phase, we need to create a src/nativeInterop/cinterop/SwiftChachaPoly.def file:
package = swift.chachaPoly
language = Objective-C

headers = SwiftChachaPoly/SwiftChachaPoly-Swift.h
headerFilter = SwiftChachaPoly/*

staticLibraries = libSwiftChachaPoly.a
libraryPaths.ios_x64 = SwiftChachaPoly/build/Release-iphonesimulator
libraryPaths.ios_arm64 = SwiftChachaPoly/build/Release-iphoneos

linkerOpts = -L/usr/lib/swift
linkerOpts.ios_x64 = -ios_simulator_version_min 13.0.0 -L/Applications/Xcode.app/Contents/Developer/Toolchains/XcodeDefault.xctoolchain/usr/lib/swift/iphonesimulator/
linkerOpts.ios_arm64 = -iphoneos_version_min 13.0.0 -L/Applications/Xcode.app/Contents/Developer/Toolchains/XcodeDefault.xctoolchain/usr/lib/swift/iphoneos/
In this file, we define the package in which the generated Kotlin code will live. We also define the header the interop tool needs to read to find the API we want to access, and the static library to embed with the Kotlin library and to later link against. Finally, we add some linker flags that are needed when linking with a library containing Swift code.
I’d like to draw your attention to the “-*_version_min” flags as they add the requirement that the iOS application that will use the library be targeted to iOS 13 or newer. Swift interop using static libraries requires this version of iOS at minimum. At the time of writing, iOS 13 or newer represents a bit more than 90% of iOS devices.
Next, we need to configure Gradle to add the defined interop phase:
val iosTarget: (String, KotlinNativeTarget.() -> Unit) -> KotlinNativeTarget =
  if (System.getenv("SDK_NAME")?.startsWith("iphoneos") == true)
    ::iosArm64
  else
    ::iosSimulatorArm64

iosTarget("ios") {
  val platform = when (preset?.name) {
    "iosSimulatorArm64" -> "iphonesimulator"
    "iosArm64" -> "iphoneos"
    else -> error("Unsupported target $name")
  }
  compilations.getByName("main") {
    cinterops.create("SwiftChachaPoly") {
      includeDirs.headerFilterOnly(
        "$rootDir/SwiftChachaPoly/build/Release-$platform/include"
      )
    }
  }
}
With this, we can run the cinteropSwiftChachaPolyIos Gradle task that will generate the Kotlin code to access the Objective-C API.
Finally, we can write our own Kotlin bridge to use that ChachaPoly API.
First, we need to transform ByteArrays to and from NSData:
internal inline fun ByteArray.toData(): NSData {
  if (isEmpty()) return NSData()
  val pinned = pin()
  return NSData.create(
    bytesNoCopy = pinned.addressOf(offset),
    length = length.toULong(),
    deallocator = { _, _ -> pinned.unpin() }
  )
}

internal fun NSData.toByteArray(): ByteArray {
  val size = length.toInt()
  val bytes = ByteArray(size)
  if (size > 0) {
    bytes.usePinned { pinned ->
      memcpy(pinned.addressOf(0), this.bytes, this.length)
    }
  }
  return bytes
}
Note that when converting a ByteArray to NSData, we use object pinning, to have the NSData access directly the byte array memory, and thus avoiding copying memory.
This optimization is not possible the other way around, so we do need to copy memory when converting an NSData to a byte array.
Next, we can write our Kotlin facade of the API:
actual object ChachaPoly {

  private fun DataResult.unwrap(): NSData {
    this.failure()?.let { error(it.description ?: "unknown error") }
    return success() ?: error("Invalid result")
  }

  actual fun encrypt(
    key: ByteArray,
    nonce: ByteArray,
    aad: ByteArray,
    plaintext: ByteArray
  ): ByteArray {
    autoreleasepool {
      return SwiftChachaPoly.encryptWithKey(
        key.toData(),
        nonce.toData(),
        aad.toData(),
        plaintext.toData()
      ).unwrap().toByteArray()
    }
  }

  actual fun decrypt(
    key: ByteArray,
    nonce: ByteArray,
    aad: ByteArray,
    ciphertextAndTag: ByteArray
  ): ByteArray {
    require(ciphertextAndTag.size >= 16) {
      "ciphertextAndTag should be at least 16 bytes long"
    }
    autoreleasepool {
      return SwiftChachaPoly.decryptWithKey(
        key.toData(),
        nonce.toData(),
        aad.toData(),
        ciphertextAndTag.toData()
      ).unwrap().toByteArray()
    }
  }
}
As you can see, once everything is in place, we only need a simple facade that transforms arguments and return types.
We use a custom unwrap extension function on DataResult to throw an exception if the code fails. We also use autoreleasepool to ensure that all NSData created in these methods are properly released when the method returns.
So, all that’s left for us is to test these functions, to ensure that everything works together.
We can write a very simple Kotlin/Multiplatform test that checks this implementation of ChaCha20-Poly1305:
class ChachaPolyTests {
  @Test fun `encrypt & decrypt simple text`() {
    val key =
      "0123456789abcdef0123456789abcdef0123456789abcdef0123456789abcdef"
      .fromHex()
    val nonce = "00000000fedcba9876543210".fromHex()
    val plaintext = "Hello, world!".encodeToByteArray()
    val aad = ByteArray(0)

    val ciphertextAndTag = ChachaPoly.encrypt(
      key, nonce, aad, plaintext
    )
    assertEquals(
      "295de91218883c99efed30a0ea56db82d1f05aa5350f49f32f923ce345",
      ciphertextAndTag.toHex()
    )

    val otherPlaintext = ChachaPoly.decrypt(
      key, nonce, aad, ciphertextAndTag
    )

    assertTrue(plaintext.contentEquals(otherPlaintext))
  }
}
This test creates a fake encryption key and nonce, encrypts the “Hello, World!” message and checks the result bytes. It then decrypts it and checks that the decrypted message is equal to the original “Hello, World!”.
With this, we can ensure that our Kotlin-to-Objective-C-to-Swift pipeline works as expected.
In the end, this is quite a lot of plumbing for a single encryption primitive. But for a library, where dependency injection is not an option, there is no way around it, and I hope this article saves you from hunting down documentation that is either missing or scattered. I’d love for this to become much simpler one day.
These articles might interest you
Tutorials, lessons learned and best practices around KOSI and the Kotlin ecosystem, from the people who maintain the libraries.
17/11/2026
Inara has no magic: read the code it writes
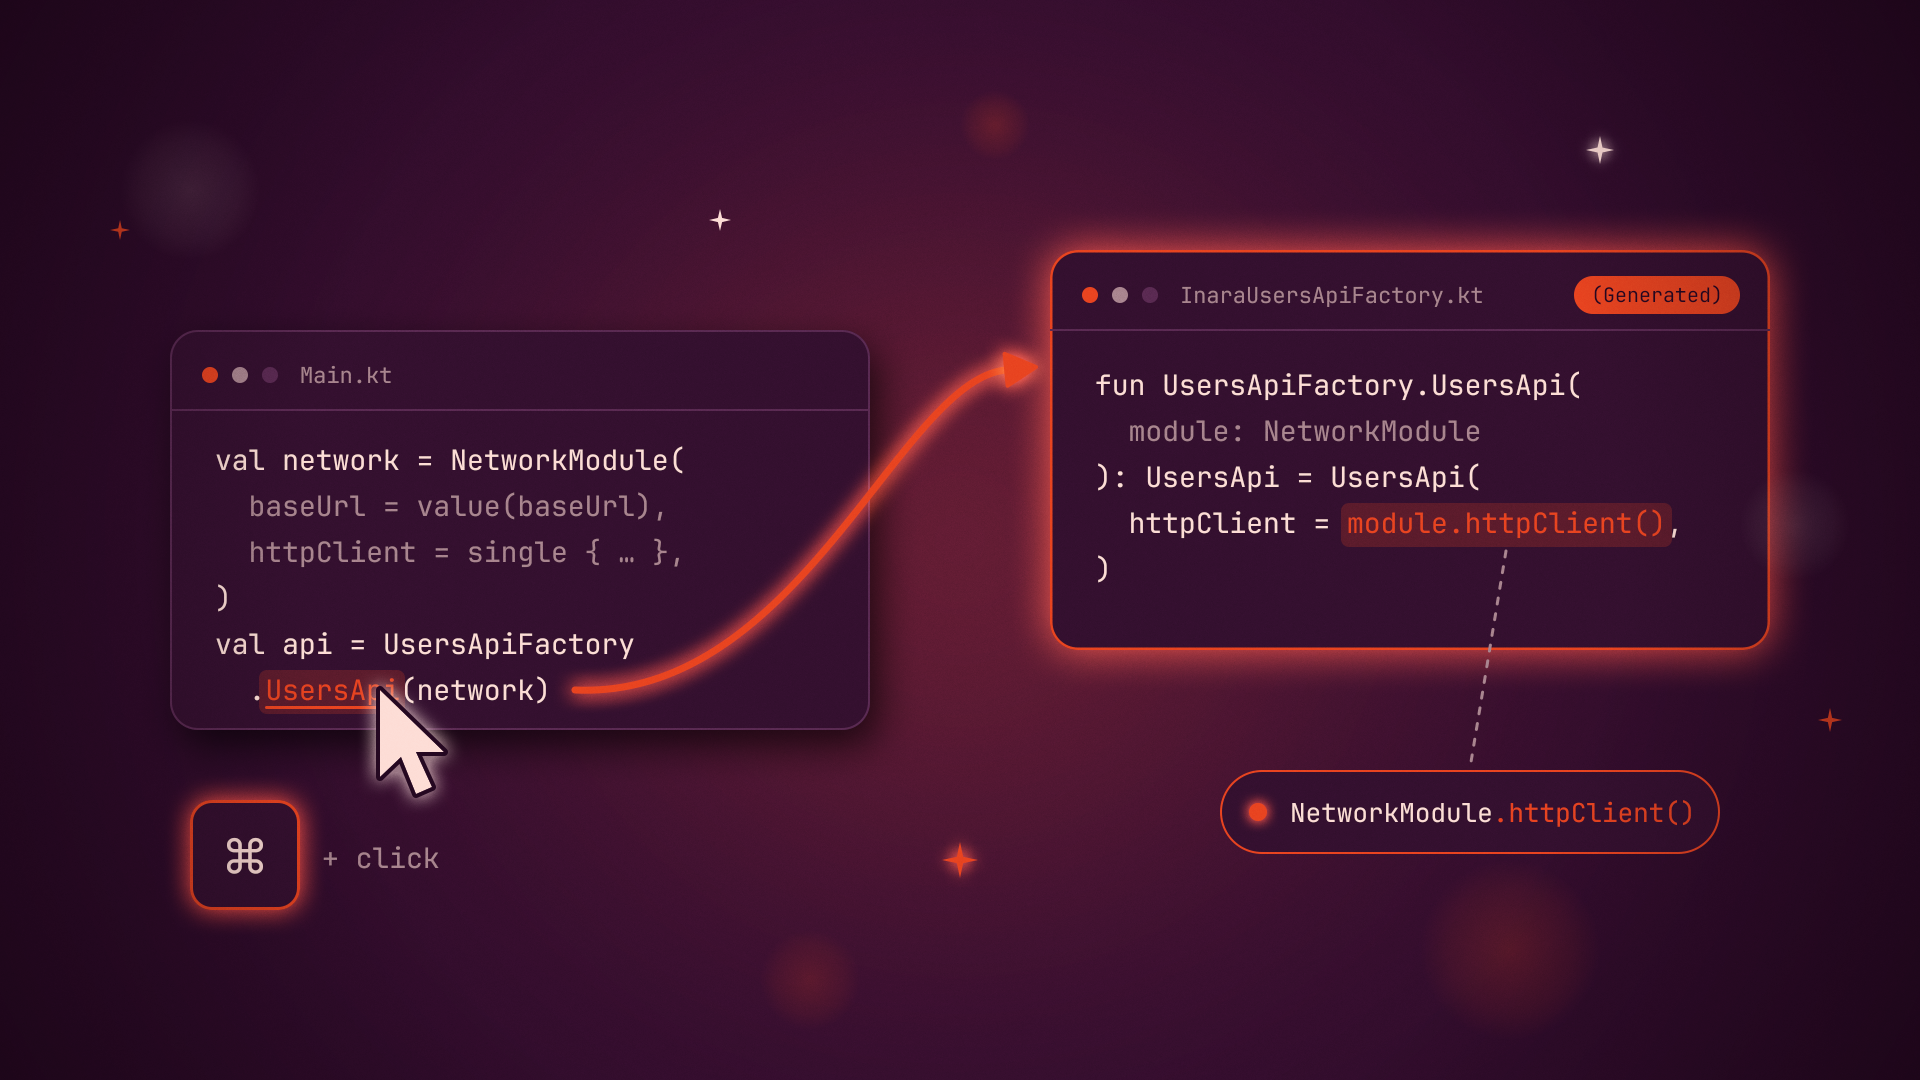
In most DI frameworks, a module is an anonymous bag of bindings, and dependencies are looked up by type. Inara gives modules an identity. Let's open the hood and read the code it generates: there is no trick, only plain Kotlin you can Cmd+click through.
Read more
09/11/2026
LARPing enthusiasm: the ghost of disengagement
I can hand the work to AI, but not my judgment or my product sense. A story of sliding into disengagement, and of a comeback still in progress.
Read more
02/11/2026
Inara: Inject your dependencies at compile time
I created Kodein, yet I now believe it is detrimental to the Kotlin Multiplatform ecosystem. Meet Inara, a Kotlin Symbol Processor that resolves your dependencies at compile time, and learn why we are sunsetting Kodein.
Read more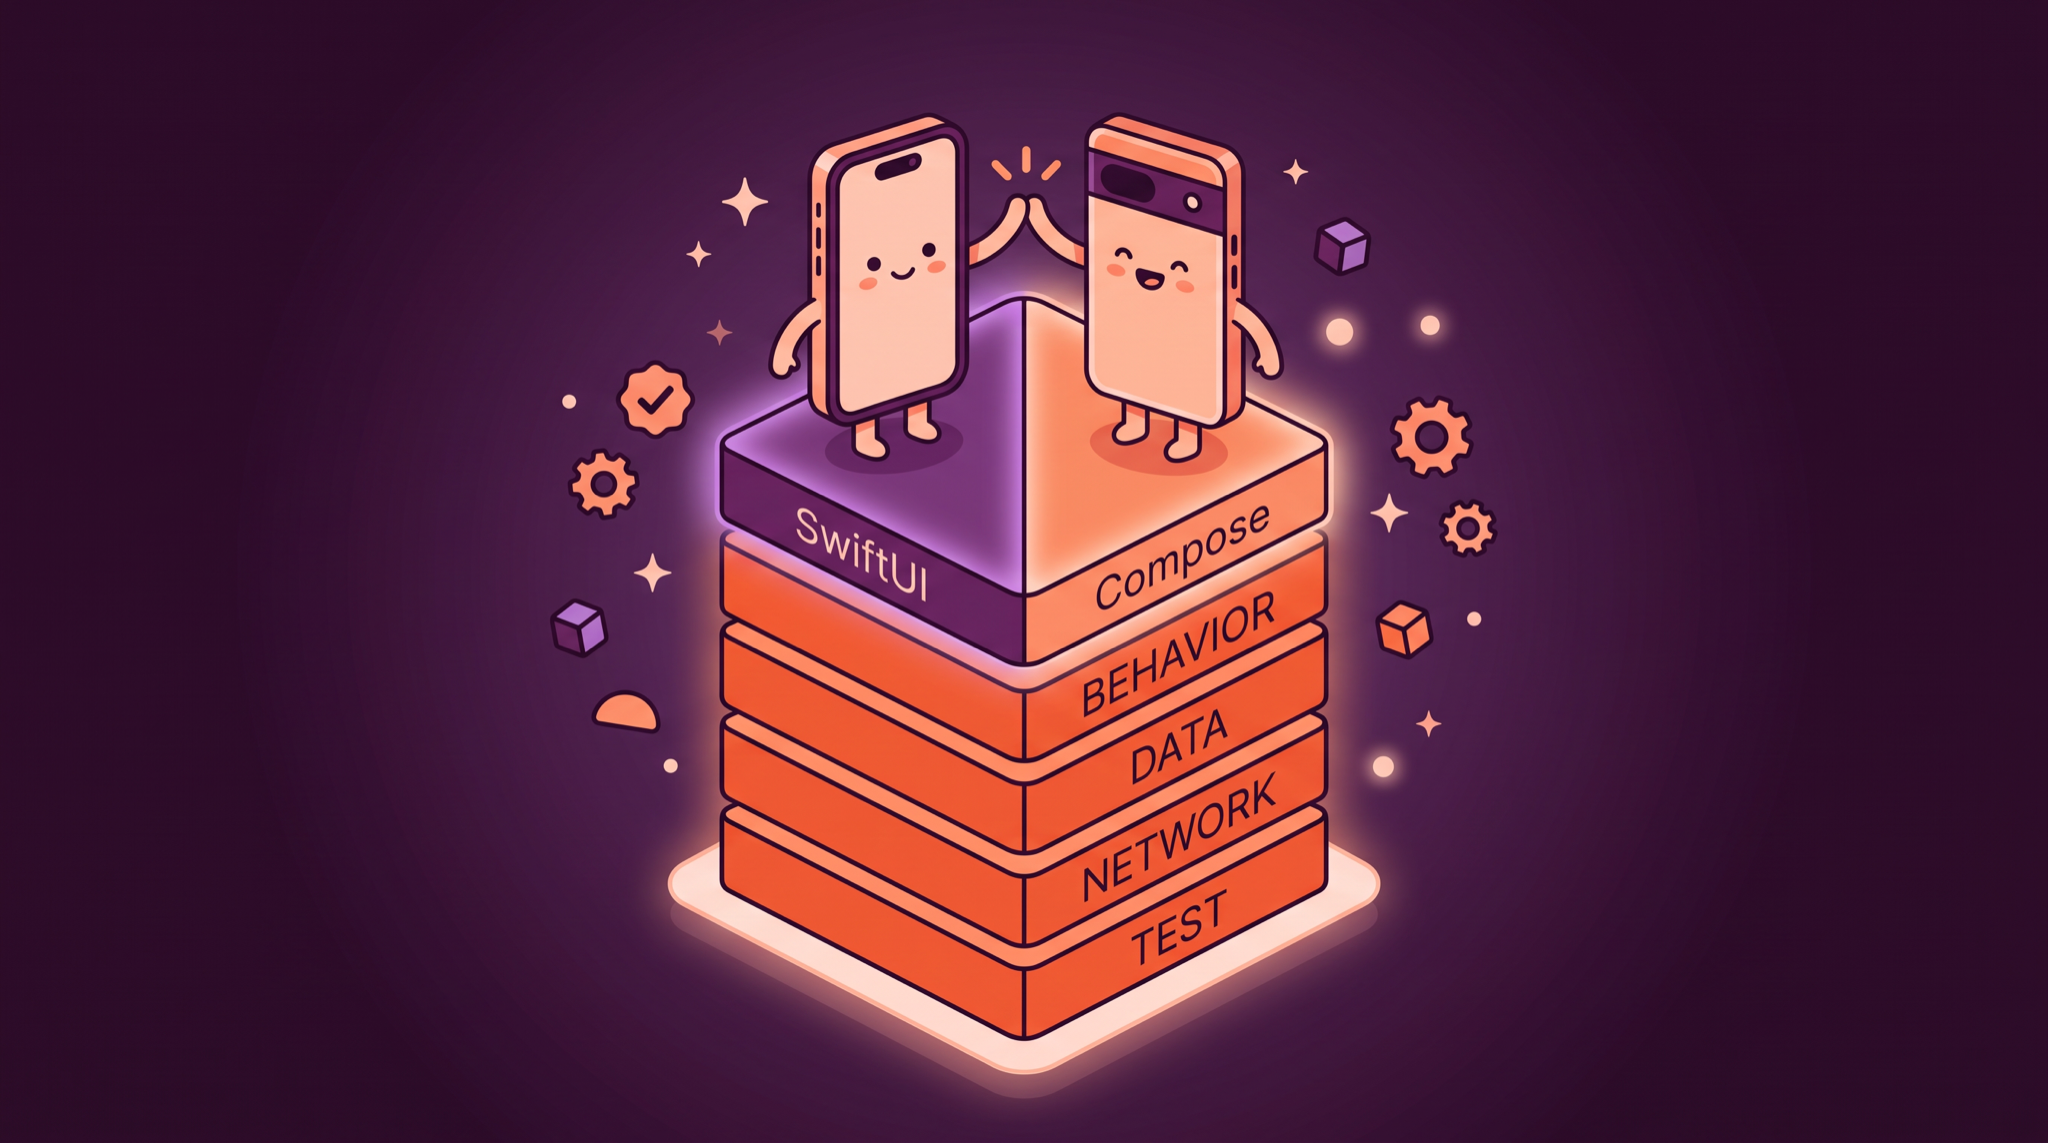
26/10/2026
Agentic coding has killed cross-platform frameworks!
Agents made it cheap to write native code twice, so is cross-platform dead? Not quite: what changed is the question. Share what must be identical, and check it once.
Read more
19/10/2026
LARPing enthusiasm: the AI creativity frenzy
AI lets me build in weeks what once took years, and it feels like a drug. Am I really creating, or just LARPing enthusiasm? A personal reflection on agency, will and shared code.
Read more
17/10/2026
MocKMP: a mocking processor for Kotlin/Multiplatform
Want to run your unit tests on every Kotlin/Multiplatform target? MocKMP generates mocks and fakes at compile time with a Kotlin Symbol Processor, no reflection needed, and keeps a familiar mocking API.
Read more